BONNET STRUT INSTALLATION GUIDE
Upgrade your 70 Series with our premium Bonnet Strut Kit — designed to make opening and closing your bonnet effortless. This guide will walk you through the simple installation process step-by-step, with no drilling or permanent modifications required.
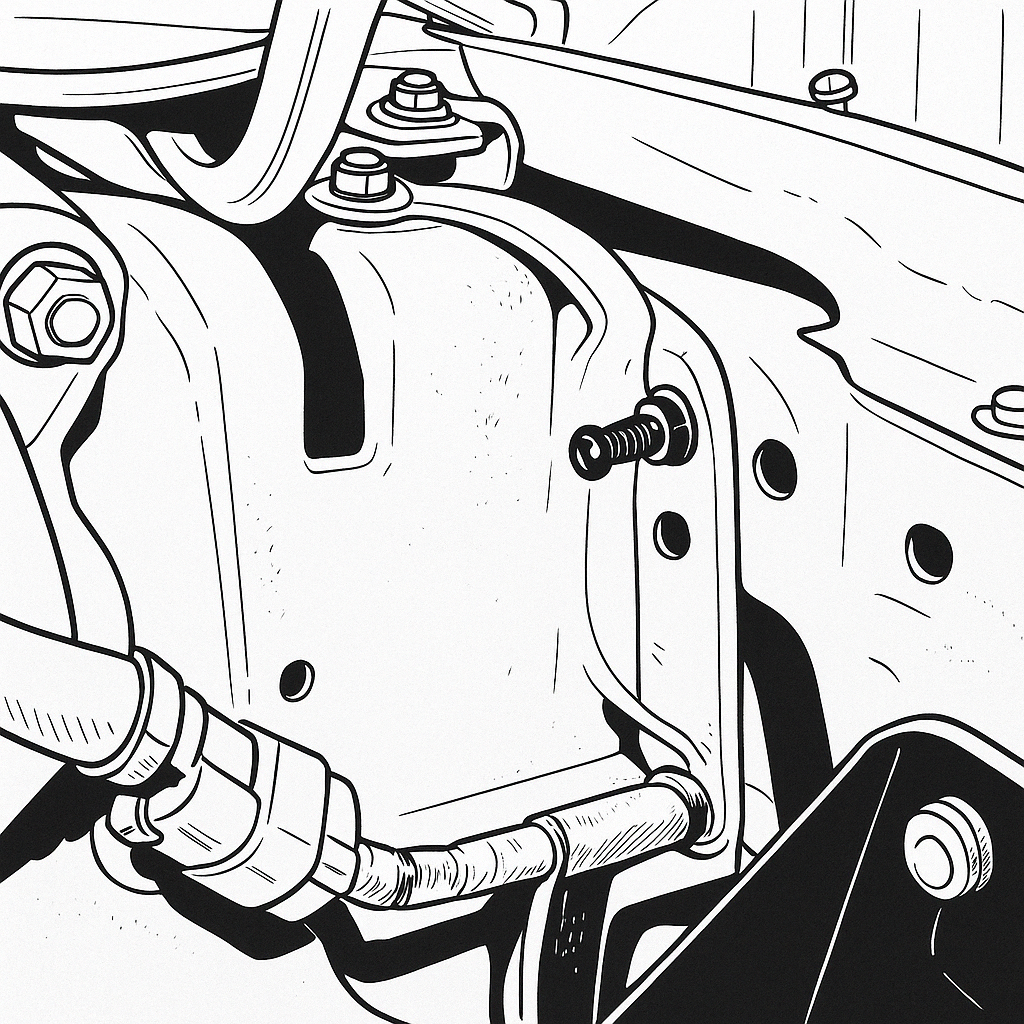
STEP 1
INSTALL BALL STUD
Locate the quarter panel bolt nearest to the firewall inside the engine bay. Remove this bolt and replace it with the supplied ball stud and washer.
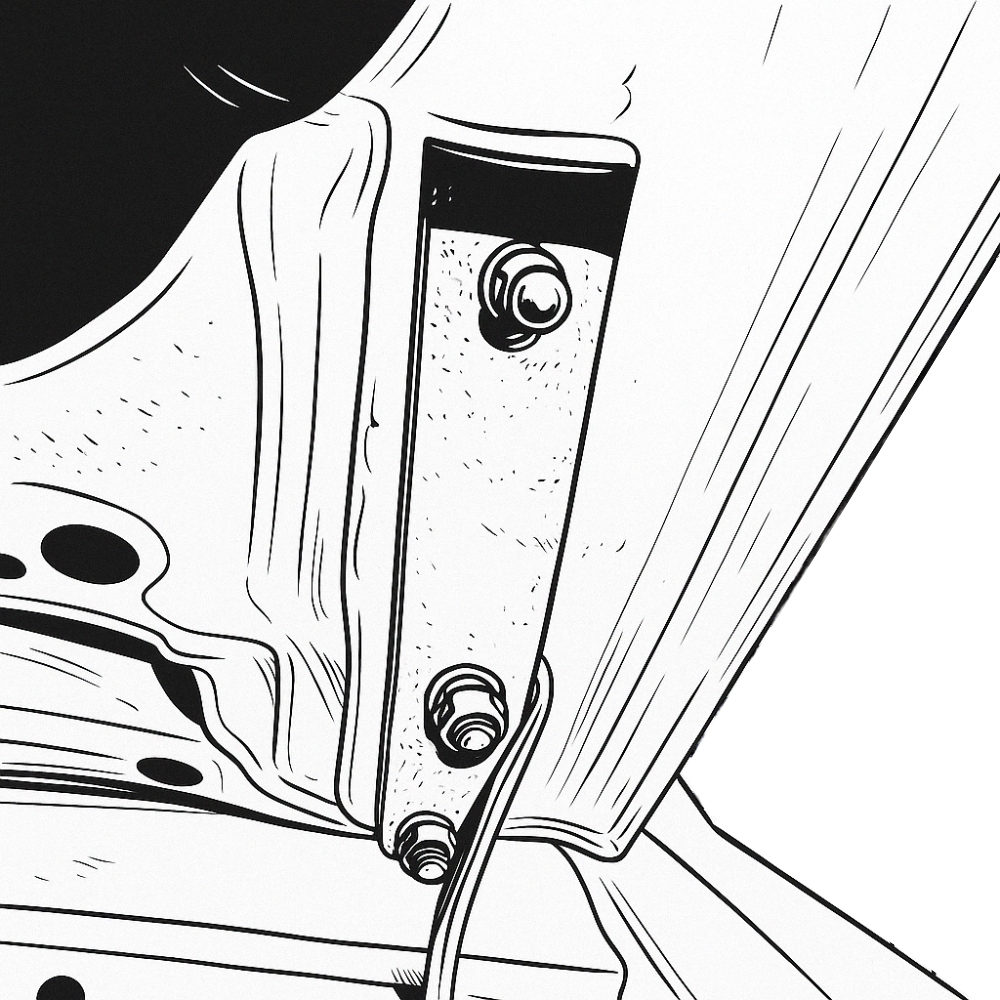
STEP 2
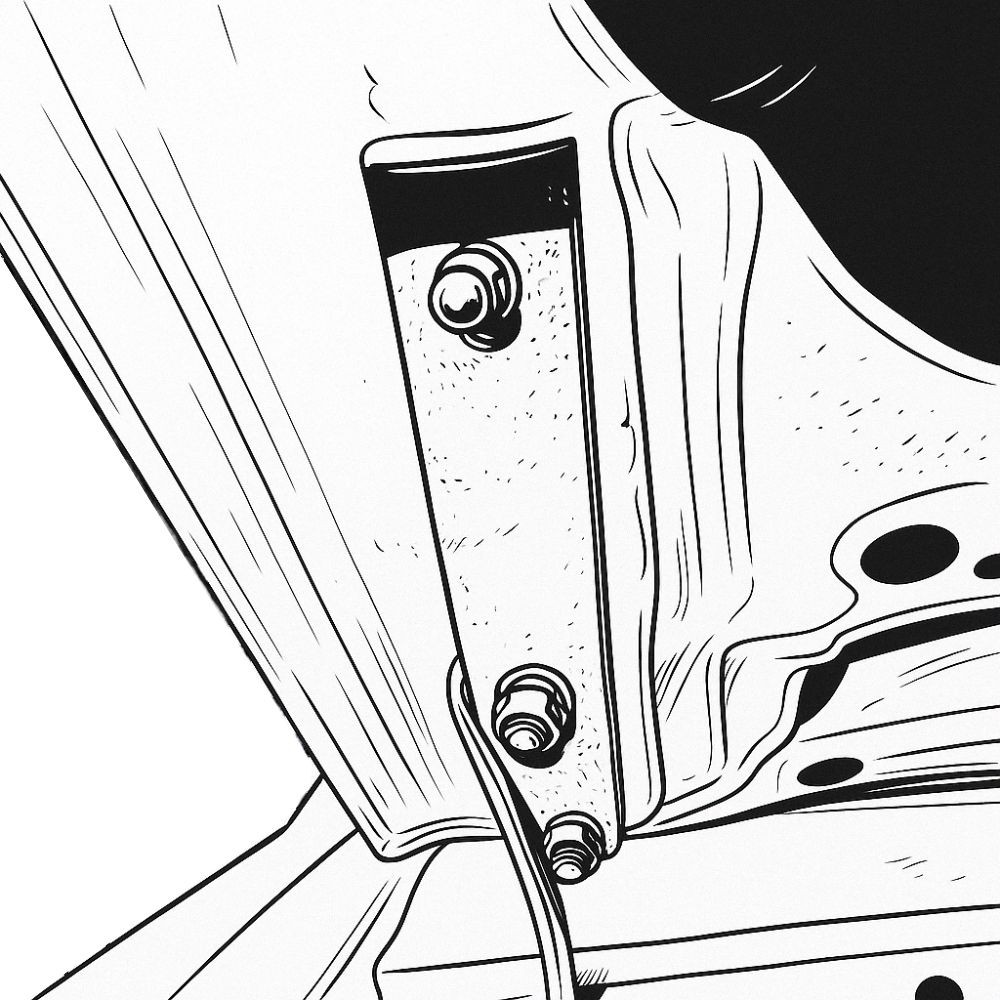
MOUNT THE BRACKET
Remove the bonnet hinge bolts and position the bracket using the longer bolts and washers provided in the kit. Ensure the ball stud on the bracket is facing downward.Tip: If the bonnet becomes unstable, remove and replace one hinge bolt at a time to keep it secure.Note: The brackets are side-specific — make sure each one is fitted to the correct side.
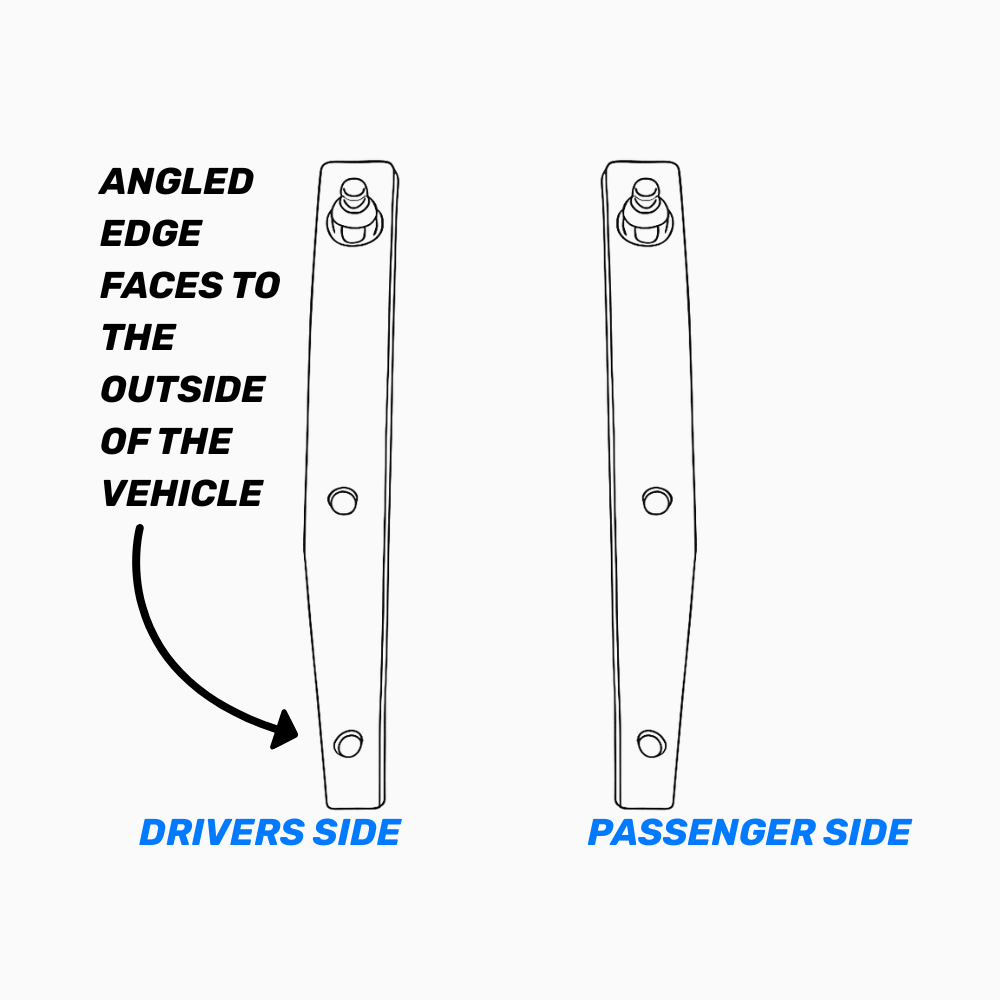
NOTE:
ORIENTATION OF BRACKET
The angled edge of the bracket must face outward, towards the side of the vehicle. If the flat edge is facing outwards instead, the struts will not function correctly.
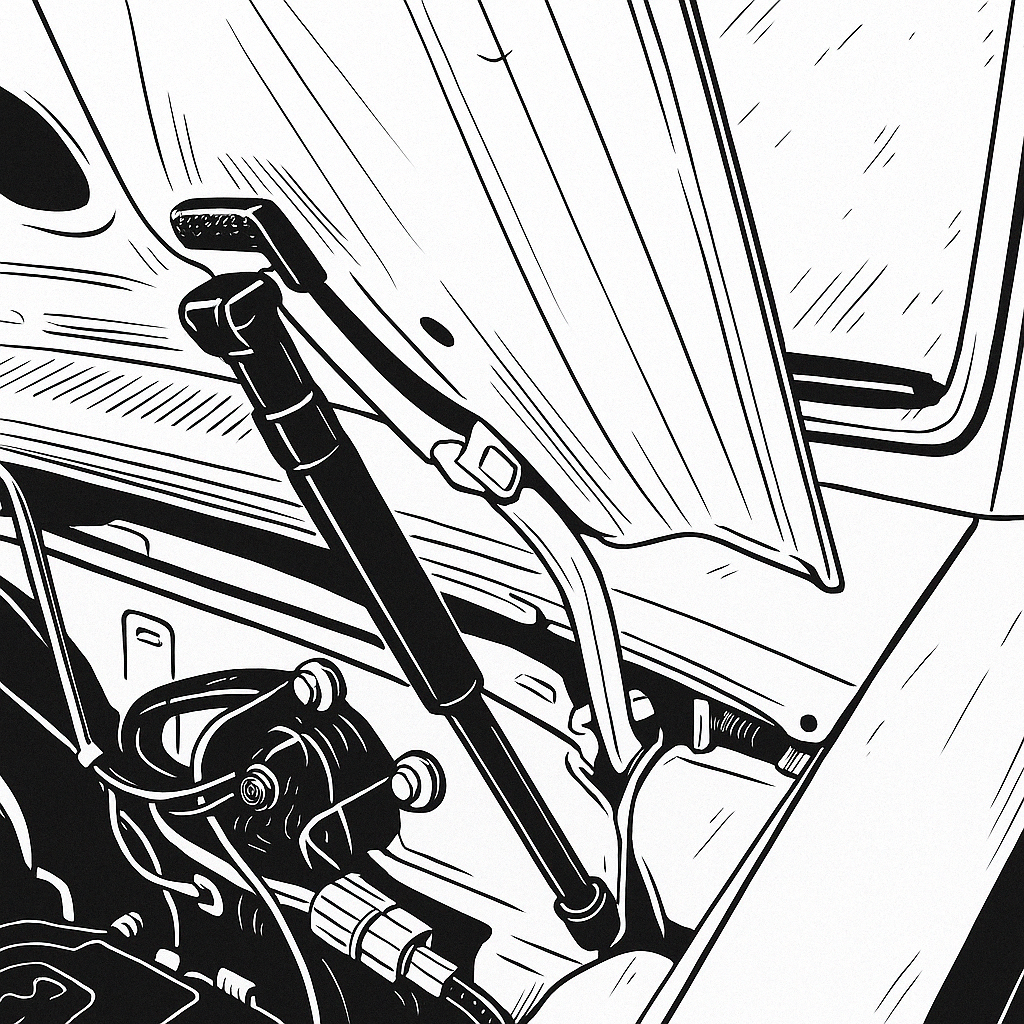
STEP 3
ATTACH THE GAS STRUT
Push the gas tube end of the strut onto the upper ball stud as shown. With assistance, lift the bonnet as high as possible and connect the lower end of the strut to the ball stud on the bracket.
If you're having trouble attaching the lower end: Loosen the bracket bolts slightly and pull the bracket forward to make alignment easier.
STEP 4
REPEAT ON OPPOSITE SIDE
Install the second strut using the same steps.
